Sweet Orchard Blog Tour

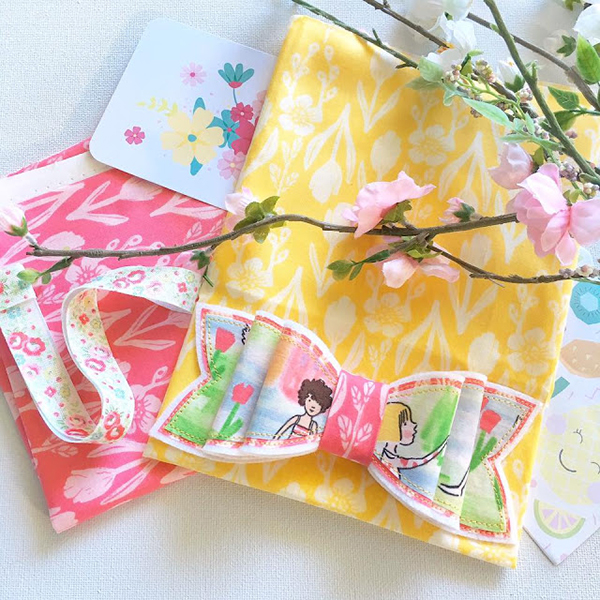
The day has finally arrived - my debut fabric collection for Riley Blake Designs, 'Sweet Orchard' is hitting stores as I type this! This has been such a dream come true, I still have 'pinch-me' moments every day and I am so proud to work as a fabric designer for a company as amazing as Riley Blake Designs.


To celebrate the launch of Sweet Orchard, we are of course holding a blog tour - you know how much I love them! Join us each day over the next two weeks as these incredibly talented makers from around the world share their Sweet Orchard projects. I don't know about you, but I am just a wee bit excited to see what they've all made!

                                  15 August
  Nadra
                                  15 August
  Sarah
                                  16 August
  Jemima
                                  16 August
  Anorina
                                  17 August
  Lisa
                                  17 August
  Minki
                                  18 August
  Kimberly
                                  18 August
  Keera
                                  19 August
  Cassie
                                  19 August
  Liz & Elizabeth   
                                  22 August
  Samantha
                                  22 August
  Xanthe
                                  23 August
  Peta
                                  23 August
  Stacy
                                  24 August
  Sharon
                                  24 August
  Amy
                                  25 August
  Sarah
                                  25 August
  Kristyne
                                  26 August
  Jennie
                                  26 August
  Megan


Follow the blog tour on Instagram and Facebook each day with the tags #sweetorchardblogtour and #sweetorchard, where we will also have a few fun giveaways! Hope you find lots of inspiration, and feel free to use the tags to join in with your projects also - I would love to see what you are making!

Poppy Needle Case

When I was at the US spring quilt market in May, I had the great pleasure of meeting the lovely ladies from Zakka Workshop - a really cool publisher specialising in reproducing Japanese craft titles in English. Not only new titles but also classic coveted ones that used to sell for a small fortune on ebay and Etsy (such as the 318 Patchwork Patterns by Kumiko Fujita and the soon-to-be-published-in-English-FINALLY Happy Flower Quilts by Atsuko Matsuyama). I couldn't resist picking up a couple of their new titles, one of which was Simply Stitched by Yumiko Higuchi.


Yumiko is one of the most renowned embroidery artists in the world, having published multiple embroidery books. Her wool stitcheries are simply to die for - go check out her social media feeds or her website www.yumikohiguchi.com if you would like to see more! So much inspiration!

I've made multiple wool needlepoint projects on canvas in my pre-Down Grapevine Lane days, but had never embroidered on fabric with wool before. Kinda kicking myself that I haven't tried it sooner - the thicker wool gives a lovely padded three dimensional finish that makes the embroidery designs really 'pop' off the fabric. I am a convert. (Tip: if like me you embroider a fair bit and sometimes are too lazy to use a hoop to stretch the fabric, don't do it for wool embroideries. This photo is my second attempt at this embroidery - the fabric warps WAY too much without a hoop).


The project I made was the needle case project in Simply Stitched, but instead of the thistle pattern I used the poppy pattern from one of the other projects, as I loved its simplicity. It paired up beautifully with the dark grey background fabric (from Riley Blake's new range of basic cottons called 'Shades' - I love the velvety washed look - it's just cotton folks!).


My inspiration for the decoration of the felt pages came from Amy Sinibaldi's beautiful needlebooks - a little lace, a button or two, edges trimmed with scallop pinking scissors - just the right amount of Zakka sweetness! The cute strawberry buttons are from Ministry of Fabric and the pale peach fabric under the needle case is also available in the same shop here.


I hope you like my needle case and are inspired to give wool stitchery a go. This book is full of so many amazing patterns, and it's very clearly illustrated and explained so suitable for all levels. Highly recommend!

Collaborate For A Cause - A Book Nook

This year's Collaborate for A Cause (C4AC) charity auction has just kicked off, and I wanted to share with you this awesome event and the collaboration that I have proudly taken part in this year.
In case you aren't familiar with C4AC, it's one of the highlights of the Australian hand-made calendar,  whereby hundreds of hand-maidens get together to make items which then get auctioned off over one weekend, with all proceeds going to charity. I have taken part in it since the early days of Down Grapevine Lane, and I love the buzz and excitement that surrounds the whole event. Seeing all the pretty things made by so many talented makers, and the hand-made community coming together for a good cause - it really is the best feeling in the world and I'm so proud to be a part of it.

Without further ado, here is the collaboration that I was part of: a 'Book Nook' curated by the lovely Fiona who is @fee_loves on Instagram. A true lover of 'hand-made', Fee has a real talent for putting together items to create little 'hand-made' heavens! She also took all the photos below under her new business Little M.E Images.

Don't you wanna curl up in there? The fabric is we used is the amazing Sommer collection by Sarah Jane Studios which was kindly donated by the fabulous Deanne from Fabric Pixie, a great Australian fabric store. Here are some close ups of the items that come in the set, and the fabulous businesses that donated them:
~ A hexagon quilt, hexie cushion and apple pie cushion by Piccolo Studio ~

~ Floor pillow by the Toffee Tree & doll face cushion by Blooms and Butterflies Doll Studio ~

~ Stunning dress by Ellie's Handmade ~

~ Dr Seuss wall art by Silent Little Whispers ~

~ Hair bow by Creative Butterfly Designs ~

~ Poodle book cradle by Bear and Sparrow ~


~ and finally, my contribution - a padded name bunting ~

All proceeds raised from the sale of this book nook set are going to Rett Syndrome Australia. Collaborate for a Cause album is here and you can find our collab here, make sure to read the description on the album first before you bid on anything, especially for buyers outside Australia. Bidding closes 8pm, Sunday 31 July. Also do check the rest of the album as there are some unbelievably stunning collaborations this year, and all for a good cause. Enjoy! :-) 


Baby Cashmerino Cowl


We are still in the depths of winter here in Australia, so I've been working on a pretty pastel cowl for myself on and off over the last three months. My hands are slowly getting back to normal (well, by that I mean my normal, they are still pretty numb but I am used to do that) - so I have been able to crochet again and get this cowl finished before winter ended!


I got the inspiration for this from one of my favourite crochet bloggers, Heather from Pink Milk. She made one for herself and kindly shared her method and measurements in this blog post, so it was very easy to replicate.


The stitch is called camel stitch and I love the knitted effect it creates. It produces such a lovely drape as well! I used Debbie Bliss Baby Cashmerino in an array of pastel colours - if ever I decided to engage in a monogamous relationship with a brand of yarn, this would be it. It comes in a large selection of pastel and bright colours, and is just so soft to touch and beautiful to work with. Love love love. I may have stashed away an obscene number of balls when there was a sale on a few months ago (for which I also blame Heather entirely - read this post from her blog and you will know why).


Like Heather's cowl I used 7 colours, but as this is a lower ply yarn I used a smaller size hook (4 mm) and more stitches to achieve the required width (14"), also I made 6 rows of each colour rather than 5 to get the right height (10").


There's been a lot happening here at Down Grapevine Lane headquarters. My lovely hubby just installed floor to ceiling bookcases in my sewing room so I've been doing some major stash re-organisation to get all the fabric chaos under control. I am also working on my next fabric collection for Riley Blake (squee!), making a big quilt with Posy Garden, and doing some secret sewing on the side. And several blog tours coming up (including my own for Sweet Orchard!) so I am planning ahead for those, and playing with new designs. It never ends! But I wouldn't have it any other way! :-)


Thanks for visiting and have a lovely day, wherever you are in the world!

Pixie Noel Blog Hop: Xmas Tree Cushion!


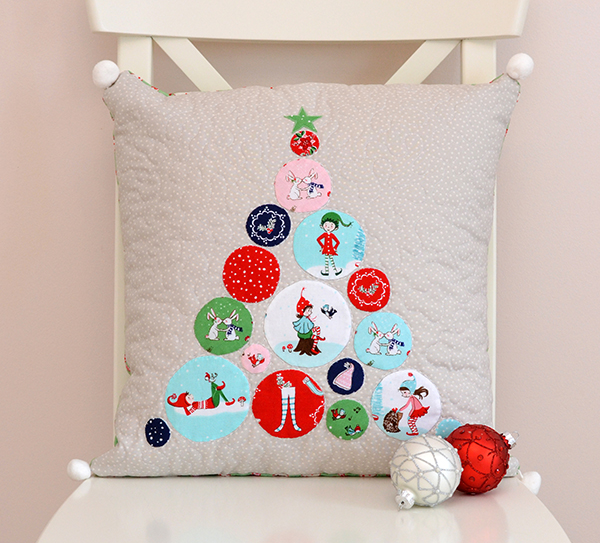
Welcome to my stop on the Pixie Noel blog hop! This latest Christmas collection by fellow Riley Blake designer Tasha Noel is adorable, just like all her fabric! Her booth at spring quilt market was in one word incredible (there is a picture of it in my market round-up post in case you haven't seen it). So I am delighted to be taking part in her blog tour today with my Pixie Noel Christmas tree cushion.


Pixie Noel was made for fussy cutting in my opinion, so I thought interfaced applique circles would be the perfect way to display the cute details in this collection. This is how I make my applique circles:

- Prepare circle templates in varying sizes (1" to 3" in 1/2" increments) by cutting circles out of thin template plastic - I get mine from Spotlight in the quilting section. These templates make it so easy to centrally align the motif that I am fussy cutting. I have a big stash of these templates in all sorts of shapes that I keep at hand for future projects.
- Centre the motif under the circle template, and trace around the perimeter with a Pilot Frixion pen. If the fabric is transparent enough you should do this on the reverse side of the fabric. If not, trace around the circle on the right side of the fabric, then later you can transfer the circular mark onto the reverse of the fabric on a window or lightbox.
- Cut out the fabric leaving at least 1/4" allowance all the way around - I tend to cut a rough square of fabric with scissors. This doesn't need to be precise.
- Cut a piece of nonfusible lightweight interfacing the same size as your fabric.
- Place the right side of your fabric against the fusible interfacing, then machine stitch all the way around the traced line, closing the circle with your stitches. Tip: use a very short stitch length and sew slowly to make your circle as round as possible.
- With pinking shears trim off all excess material all the way around. Tip: get as close to the stitches as you dare, especially if the circle is small. Less bulk = neater circular shape.
- With pointed scissors cut a large + shape on the back of the interfacing, without getting too close to the edges. Turn the shape inside out through the + , using a blunt pointy object push out the seams until you have a neat circle. Press.
- Applique onto the background fabric by hand or by machine.

Easy peasy! You can also do your circular shapes as raw edge applique using fusible web, but I prefer the interface method as the circles 'puff' up a little, adding a three dimensional effect to the cushion front. Perfect for baubles!


For the quilting, I stipple quilted around the Christmas tree (I am getting faster at this finally!), and hand-quilted around each bauble with DMC Perle cotton no:8. I didn't have enough of the large pompom trim for the whole perimeter of the cushion, so I added one pompom in each corner - I quite like the effect that created! The backing is from Elea Lutz' collection Little Joys - it was such a good match.


Pixie Noel is now available in shops so you can get your Christmas sewing on! If you would like more inspiration, check out other fun projects in the blog hop over the course of this week and next, which you can follow along on Instagram (#pixienoelfabric and @tashanoel1). Thanks for stopping by!

Related Posts Plugin for WordPress, Blogger...