
MATERIALS:
You will need:
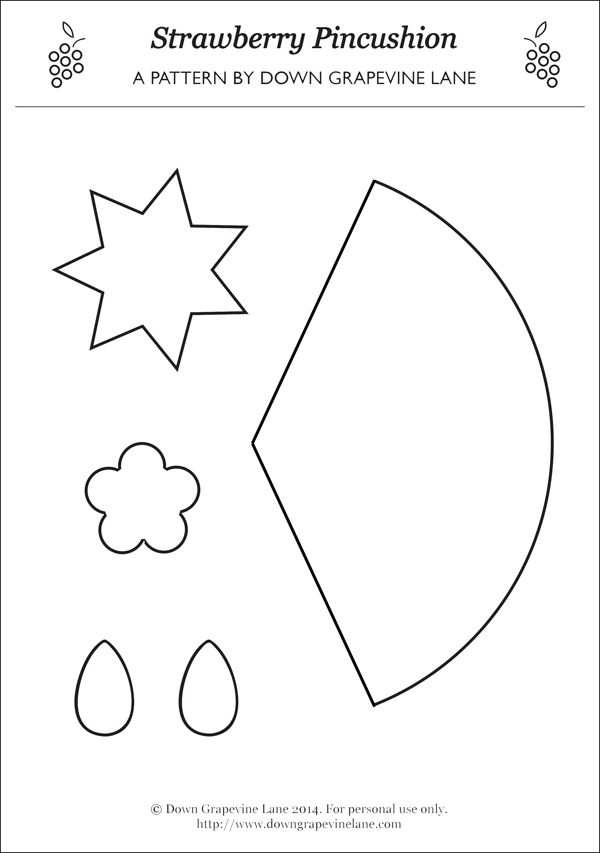
- The pattern (download it from here as a PDF and print it to A4)
- Small piece of fabric - approximately 15 x 20cm
- Green and white felt & stranded cotton in matching colours
- Coloured beads or pins for the flower decoration
- Ribbon or string for the hanging loop
- Stuffing material (e.g. Hobbyfill)
STEPS:
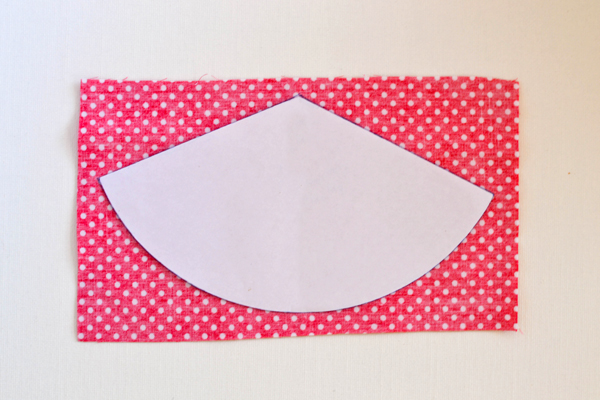
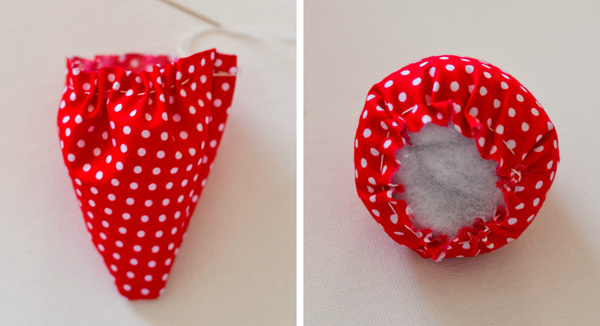
1. Trace the pattern for the strawberry body onto the back of the fabric and cut it out.
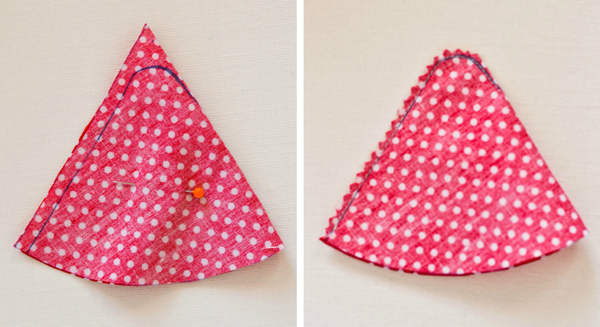
2. Fold the cut shape in half, then trace a line by hand approximately 1/4 inch from the edge and curve it around so you get a nice rounded bottom rather than a pointy one. Using a short stitch length sew along the traced line, securing your ends. Trim the excess material with pinking shears.
3. Turn the strawberry inside out, then sew a gathering stitch by hand all the way around the perimeter of the strawberry, approximately quarter inch from the edge. Stuff tightly with stuffing, pull the gathering stitch tight, and secure with a knot.
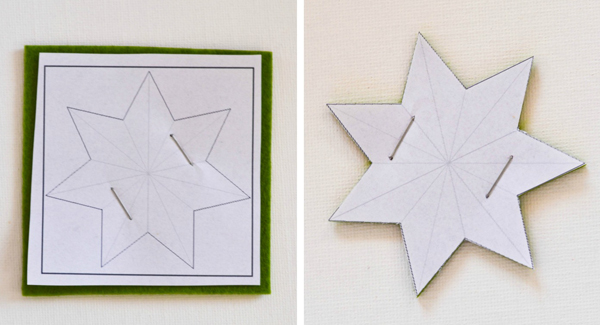
4. Cut out the shapes for the leaves and flower from the pattern sheet, leaving a margin around them. Staple onto the felt using a regular stationery stapler (or you can pin it, but I prefer stapling as it doesn't warp the fabric as much and you get a cleaner shape, especially for small pieces). Cut the pattern and felt on the line, remove and discard the staples and paper.
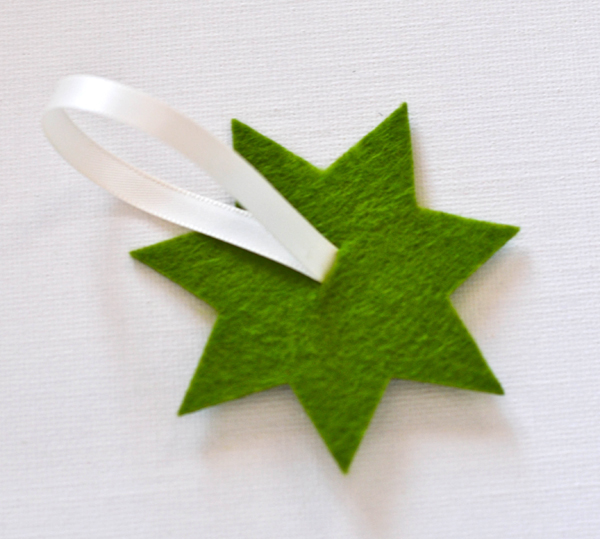
5. Cut a 10cm piece of ribbon or string, fold in two and stitch the ends together with a small knot. Slice a small hole in the middle of the green felt for the top of the strawberry, and push the ribbon into it. You can secure it onto the felt with a small stitch now if you want, but I do that whilst I stitch the green leaves on, a few steps later.
6. Pin the top of the strawberry onto the body. Using 2 strands of green cotton and an applique stitch, stitch the top of the strawberry onto the body. Tip: When I do the points I push the needle down through the very tip of the felt for a cleaner finish.
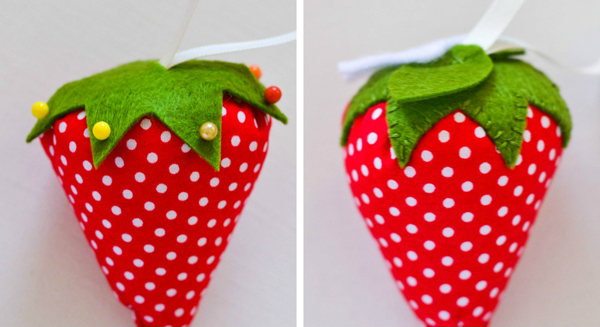
7. Stitch the leaves and flower onto the top of the strawberry with a little decorative cross. Decorate the top of the flower with pins (like I have done here) or coloured beads.
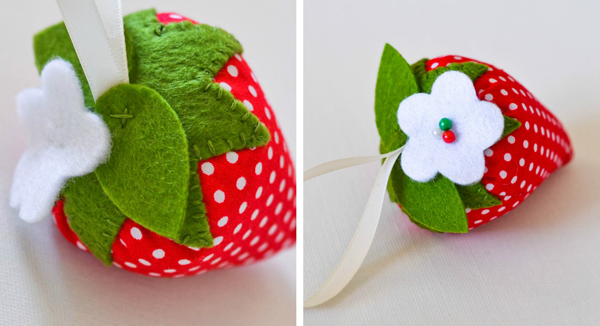
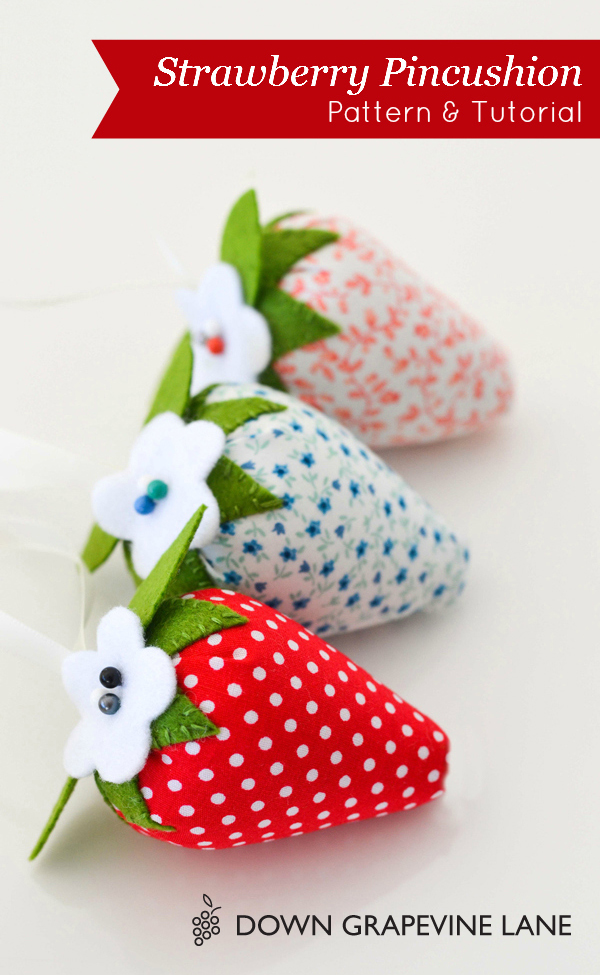
And there you have it - one cute strawberry!


Pretty.
ReplyDeleteOhh!!! Thank you, I'll try this...
ReplyDeleteThank you so very much
ReplyDeleteThese strawberries are so cute! I might just have to make some for spring!
ReplyDeleteI'm in the mood to sew a small project today and these are the cutest! I have to check my fabric stash to see if I have something suitable. I might include a small magnet inside to stick it near/on my machine when sewing. Thanks for this! xo
ReplyDeleteThe magnet is such a great idea. Thanks
DeleteNO MAGNETS NEAR A COMPUTERISED SEWING MACHINE EVER. Just saying. But the strawberries are delightful. Thank you for the pattern.
DeleteAdorable! Thank you.
ReplyDeleteHi, just wanted to say Hello, I'm a new follower following a link for the strawberry tutorial - I love your blog your makes are gorgeous :-) xxx Thank you for sharing your makes and tutorials xxx
ReplyDeleteSo cute I love strawberries! Thank you for sharing
ReplyDeleteLovely - thanks for sharing x
ReplyDeleteThank you so much for sharing these cuties! Love Barbie's magnet idea and I think stuffing with lavender and hanging in a wardrobe would make these a perfect gift for Mothers Day too.
ReplyDeleteI love this! Thanks so much for sharing this with us!
ReplyDeleteThank you so much for sharing your tutorial you are so very kind xxx
ReplyDeleteThank you for sharing. The strawberries are adorable and I am definitely going to give them a try.
ReplyDeleteNew follower on bloglovin. Howdy from Oklahoma, USA. I love these and appreciate the tutorial. crystalbluern at onlineok dot com
ReplyDeleteNew follower on bloglovin. Howdy from Oklahoma, USA. Thank you for this wonderful pattern and tutorial. crystalbluern at onlineok dot com
ReplyDeleteCute!!!
ReplyDeleteCute!!
ReplyDeleteSedef, these are just adorable and lots of fun to make. I'm going to share this over at Molly and Mama! Thanks for a great tutorial! Lauren
ReplyDeleteHi! I got these strawberry pincushion kits from a $1 dollar bin .. I believe they were free with a sewing magazine (illegal to sell,although no where does it say "not to be sold separately" etc) So I had no instructions or anything. And I don't really sew .. I can but I don't know much. This was a great little starter. I found your beautiful photo on Pinterest & went YAY! Now I can make my strawberries! I LOVE that you thought to add the white strawberry flower .. Just makes the whole thing pop. Thanks you so much for a beautiful site & free tutorial :) I will make many of these, Christmas is basically here! And a Merry one to you :)
ReplyDeleteThese are so cute!
ReplyDeleteThese are delightful! Now to dig through my fabric stash. Thanks for sharing.
ReplyDeleteThis is just like the pattern I have had for over 20 years that I use in my Family and Consumer Sciences class.
ReplyDeleteHow adorable! I have always decorated with strawberries in my home and how perfect to add them to my sewing room! Thank you for such a sweet little pin cushion pattern! I plan to make several that will hang out on my sewing table! I love it!
ReplyDeleteThank you for the pattern. So cute. Going to make some today!
ReplyDelete